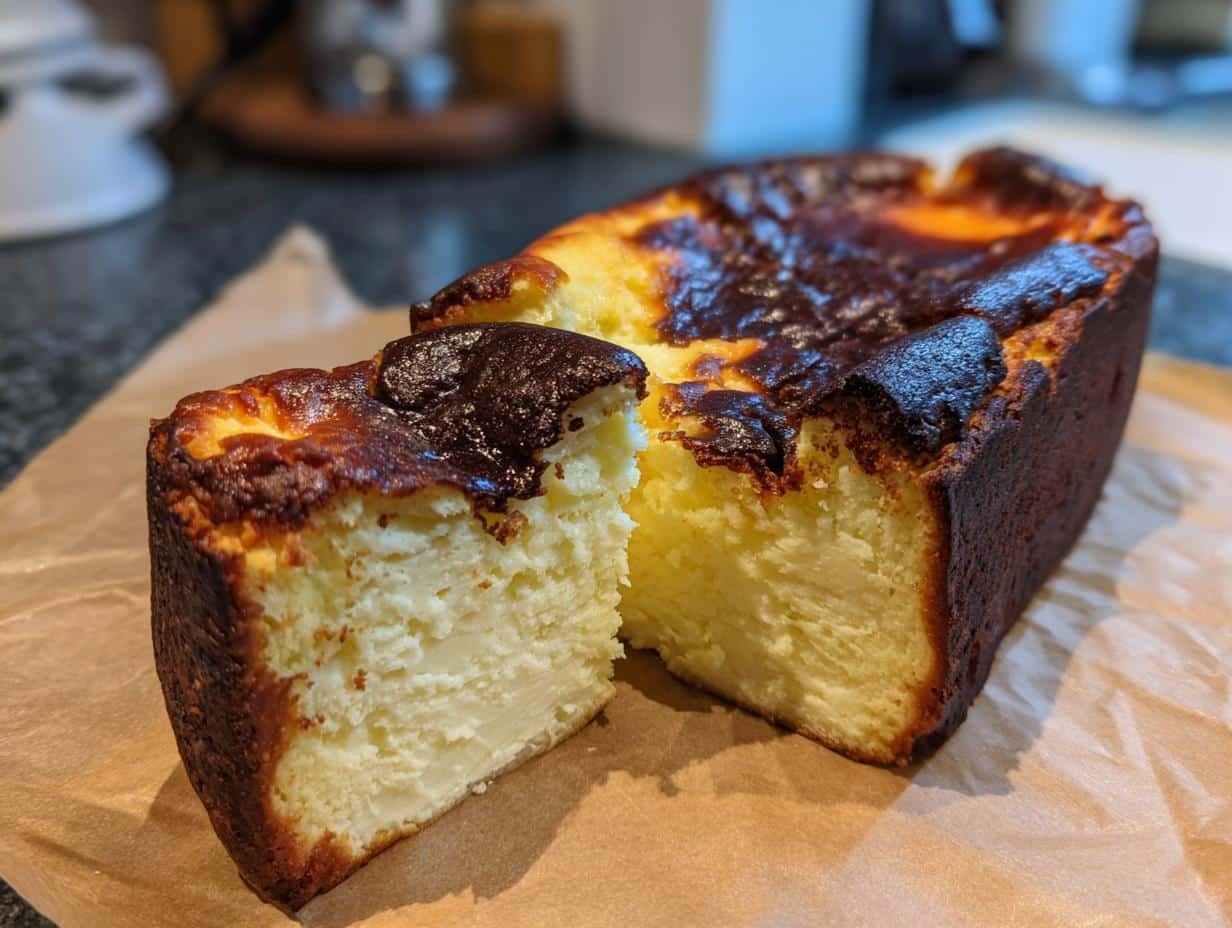
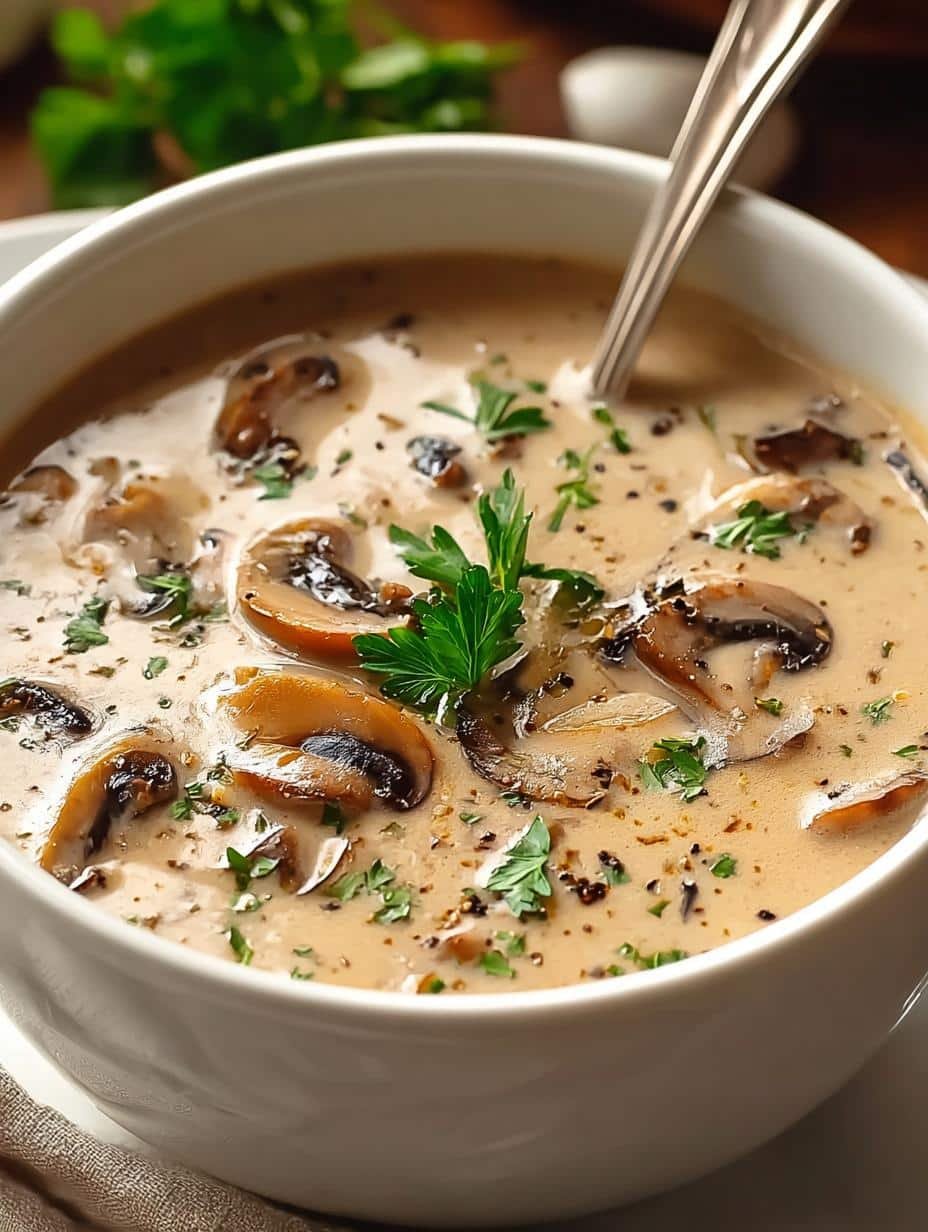
Rustic Loaf Pan Basque cheesecake has become my absolute go-to for a show-stopping dessert that’s surprisingly simple. I remember the first time I made it, aiming for that signature burnt top, and the aroma that filled my kitchen was incredible – rich, creamy, and slightly caramelized. It’s a dessert that feels fancy but is genuinely easy to whip up, making it perfect for any occasion. My friends always rave about the melt-in-your-mouth texture, and I love how using a loaf pan gives it a unique, rustic charm. If you’re looking for an impressive yet approachable dessert, this Basque cheesecake is it. Let’s get cooking!
Why You’ll Love This Rustic Loaf Pan Basque Cheesecake
- An incredibly decadent and creamy cheesecake experience.
- Minimal prep time, making it perfect for busy weeknights.
- A surprisingly budget-friendly way to impress guests.
- The unique, burnt top offers a delightful caramelized flavor.
- It’s a family-friendly dessert that appeals to all ages.
- Achieve a beautifully rustic presentation with a simple loaf pan.
- Enjoy a rich, melt-in-your-mouth texture with every bite.
- This creamy cheesecake is an easy recipe to master.
Ingredients for Rustic Loaf Pan Basque Cheesecake
Crafting this delightful Basque cheesecake is a breeze with just a few key ingredients. Using a loaf pan cheesecake setup means you get that perfect rustic shape. Here’s what you’ll need:
- 2 pounds (900g) cream cheese, softened – this is the heart of our creamy cheesecake, so make sure it’s nicely softened for smooth mixing.
- 1 cup (200g) granulated sugar – balances the tanginess of the cream cheese and helps create that signature caramelized top.
- 1 cup (240ml) heavy cream – adds richness and contributes to the incredibly smooth, melt-in-your-mouth texture we’re aiming for.
- 4 large eggs – bind everything together and provide structure to this no-crust cheesecake. Make sure they’re at room temperature.
- 1 teaspoon vanilla extract – enhances the overall flavor profile with its warm, sweet notes.
- 2 tablespoons all-purpose flour – a little bit of flour helps stabilize the batter for our rustic bread pan cheesecake.
- 1 pinch of salt – a secret weapon that actually brings out the sweetness and depth of flavor.
How to Make Rustic Loaf Pan Basque Cheesecake
Whipping up this incredible Basque cheesecake in your loaf pan is a rewarding experience. Follow these simple steps to achieve that signature burnt top and creamy center.
- Step 1: Preheat your oven to a hot 400°F (200°C). This high heat is crucial for getting that beautiful, deeply caramelized top that defines a no-crust cheesecake.
- Step 2: Prepare your 9-inch (23cm) loaf pan by lining it with parchment paper. Make sure the paper overhangs the sides generously; this makes lifting out your finished dessert so much easier.
- Step 3: In a large mixing bowl, beat the softened cream cheese with your electric mixer. You want it to be super creamy and smooth, with no lumps remaining – think velvety texture.
- Step 4: Gradually add the granulated sugar to the cream cheese, mixing until it’s fully incorporated and the mixture looks light and fluffy. This step is key for a decadent cheesecake.
- Step 5: Pour in the heavy cream and mix on low speed. Just combine it until everything is smooth; don’t overmix at this stage.
- Step 6: Add the eggs one at a time, mixing well after each addition. This ensures the batter emulsifies properly, leading to that characteristic creamy consistency of a no-crust cheesecake.
- Step 7: Stir in the vanilla extract, all-purpose flour, and that essential pinch of salt. Mix until the batter is just combined and looks perfectly smooth.
- Step 8: Pour the luscious cheesecake batter into your prepared loaf pan, spreading it evenly. It should fill the pan nicely, ready for its transformation in the oven.
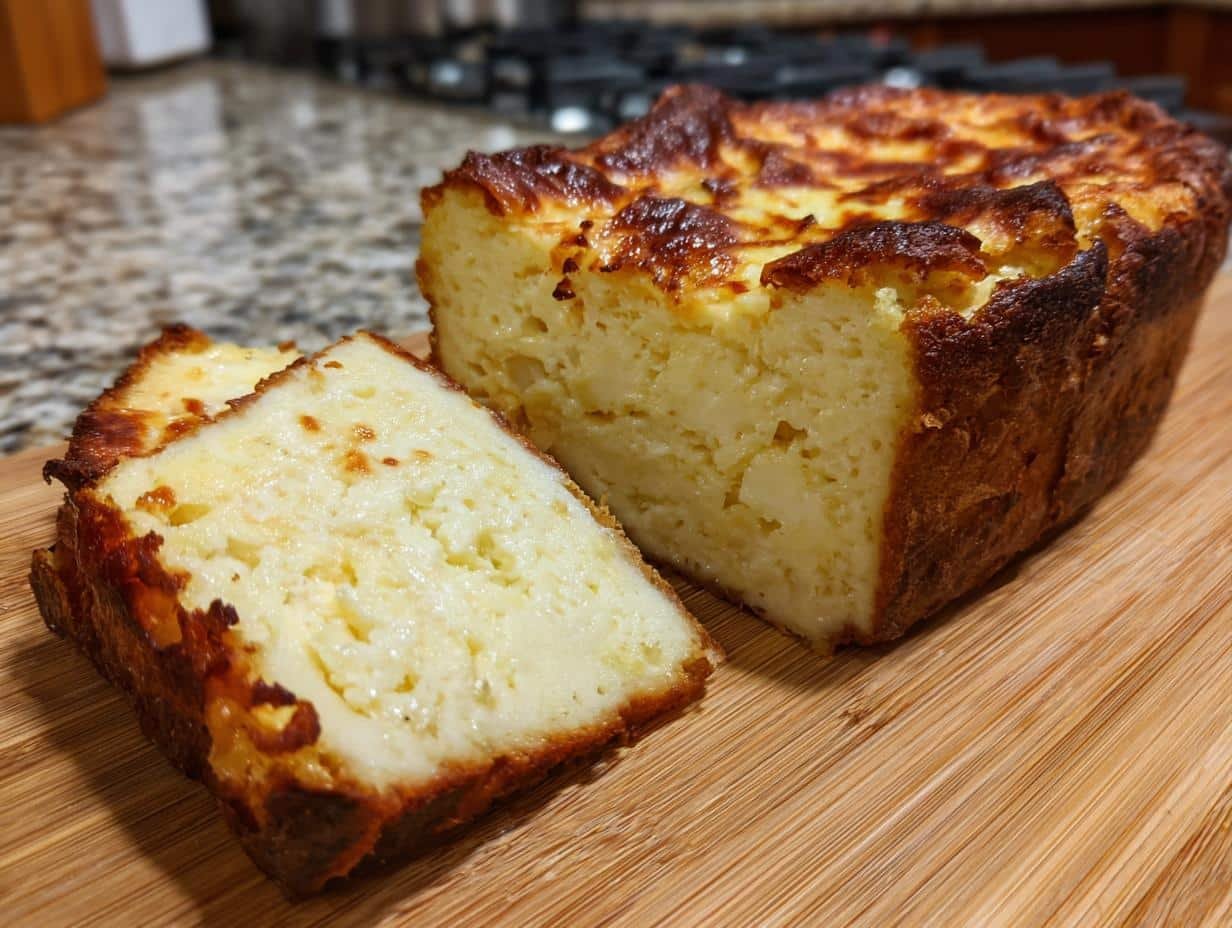
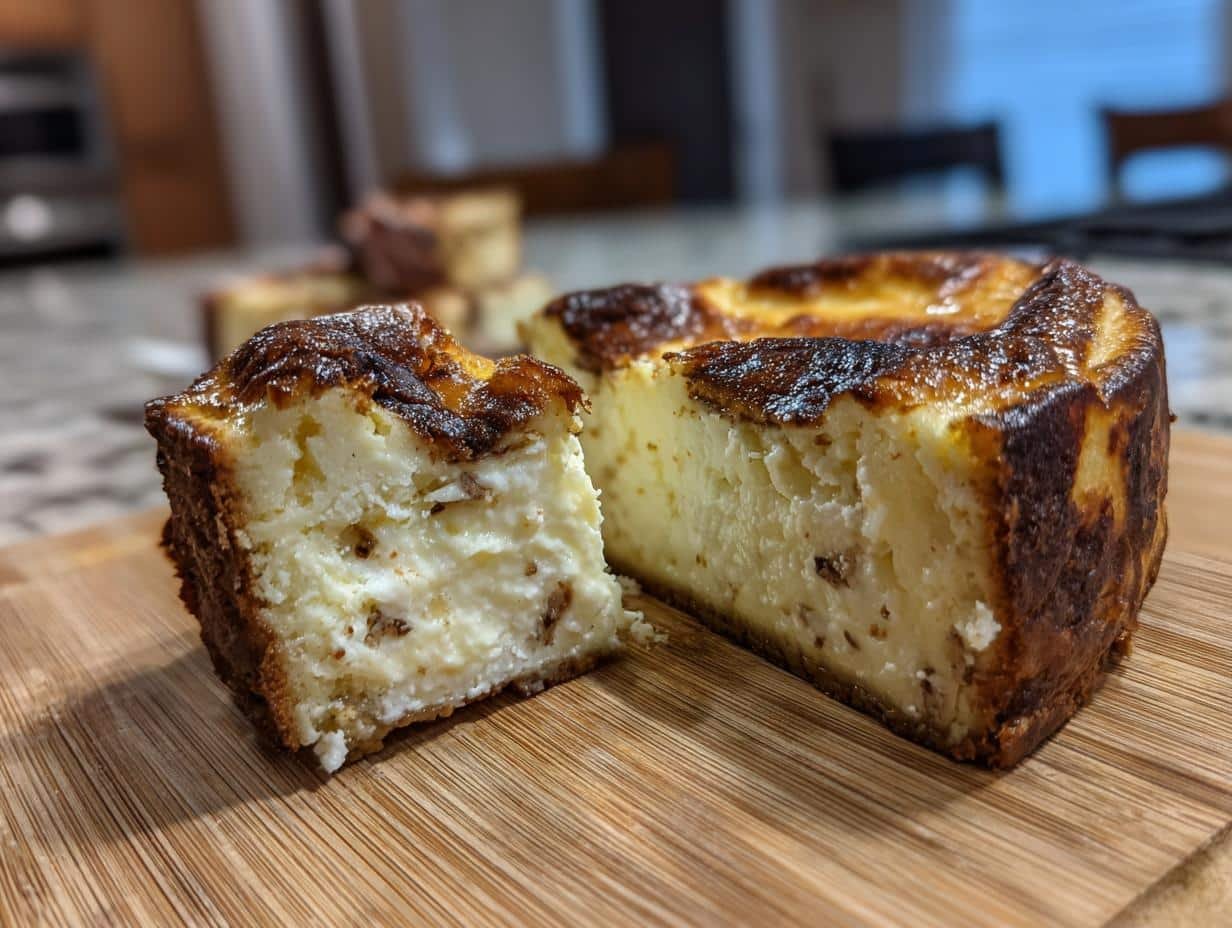
- Step 9: Bake for 50-60 minutes. You’re looking for the top to turn a deep golden brown, even appearing “burnt” in spots. The center should still have a slight jiggle when you gently shake the pan.
- Step 10: Once baked, turn off the oven. Leave the cheesecake inside for another 10-15 minutes with the door slightly ajar to let it cool gently. This helps prevent cracking and sets the texture for our rustic bread pan cheesecake.
- Step 11: Remove the cheesecake from the oven and let it cool completely to room temperature on a wire rack.
- Step 12: For the best texture and flavor, refrigerate your rustic loaf pan Basque cheesecake for at least 4 hours, or ideally overnight.
- Step 13: Once chilled, carefully lift the cheesecake out of the pan using the parchment paper overhangs.
- Step 14: Slice and serve this amazing no-crust cheesecake. It’s delicious on its own or garnished with fresh berries!
Pro Tips for the Best Rustic Loaf Pan Basque Cheesecake
Achieving that signature Basque cheesecake perfection is all about a few key techniques. Using your loaf pan for this dessert gives it an extra touch of rustic charm.
- Ensure your cream cheese is truly at room temperature; cold cream cheese will lead to a lumpy batter, which is the enemy of a smooth, creamy cheesecake.
- Don’t overmix the batter once you add the eggs. Overmixing can incorporate too much air, which might cause the cheesecake to puff up too much and then crack as it cools.
- Trust the process with the “burnt” top. That deep caramelization is essential to the Basque cheesecake flavor profile. Don’t be afraid of the dark color!
- Allow ample chilling time. The flavors meld and the texture firms up beautifully in the refrigerator, making it taste even better the next day.
What’s the secret to a perfect Basque cheesecake?
The real secret to a perfect Basque cheesecake is embracing the “burnt” top. This intentional charring creates a wonderfully complex, slightly bitter caramel flavor that balances the sweetness and richness of the creamy interior. For more dessert inspiration, check out our full range of recipes.
Can I make this Rustic Loaf Pan Basque Cheesecake ahead of time?
Absolutely! This Rustic Loaf Pan Basque cheesecake is actually best made a day in advance. It allows the flavors to deepen and the texture to set perfectly. Just cover it well and store it in the refrigerator.
How do I avoid common mistakes with a Rustic Loaf Pan Basque Cheesecake?
The biggest pitfall is not using room temperature cream cheese, leading to lumps. Another mistake is overbaking; you want a slightly jiggly center. And remember, the “burnt” top is intentional for that classic flavor! If you’re looking for other creamy desserts, you might enjoy our Caramel Brownie Cheesecake.
Best Ways to Serve Your Rustic Loaf Pan Basque Cheesecake
This easy cheesecake recipe is a stunner on its own, but serving it with a few simple accompaniments can elevate it even further. The beauty of this rustic loaf pan Basque cheesecake is its versatility. For a refreshing contrast to the rich, creamy interior and caramelized top, I love pairing it with fresh berries like raspberries or strawberries. Their slight tartness cuts through the sweetness beautifully. You could also serve it with a dollop of unsweetened whipped cream or a light fruit compote. Honestly, a slice of this delicious creation needs very little to shine!
Nutrition Facts for Rustic Loaf Pan Basque Cheesecake
When enjoying a slice of this delightful Basque cheesecake, here’s what you can expect per serving. This rustic loaf pan Basque cheesecake offers a rich, creamy experience. Remember, these are approximate values. For more information on healthy eating, you can consult resources on nutrition.gov.
- Calories: Approx. 350-400
- Fat: Approx. 25-30g
- Saturated Fat: Approx. 15-20g
- Protein: Approx. 5-7g
- Carbohydrates: Approx. 30-35g
- Fiber: Less than 1g
- Sugar: Approx. 25-30g
- Sodium: Approx. 150-200mg
Nutritional values are estimates and may vary based on specific ingredients and serving sizes used for your rustic bread pan cheesecake.
How to Store and Reheat Rustic Loaf Pan Basque Cheesecake
Properly storing your rustic loaf pan Basque cheesecake ensures it stays delicious for days. After baking, allow the cheesecake to cool completely on a wire rack. Once at room temperature, carefully transfer it to an airtight container. This is crucial for maintaining moisture and preventing it from absorbing other odors in your refrigerator. Your rustic bread pan cheesecake can be stored this way for about 3 to 4 days. If you’re looking for other baking tips, consider our Keto Cottage Cheese Bread recipe.
For longer storage, freezing is an excellent option. Wrap individual slices tightly in plastic wrap, then in aluminum foil, before placing them in a freezer-safe bag or container. This will keep your no-crust cheesecake fresh for up to 3 months. To reheat, thaw a frozen slice overnight in the refrigerator. You can enjoy it chilled or warm it gently in a low oven (around 300°F or 150°C) for about 10-15 minutes until just warmed through. This method works wonderfully for bringing that creamy texture back.
Frequently Asked Questions About Rustic Loaf Pan Basque Cheesecake
What is a Basque loaf pan and why is it used for this cheesecake?
A Basque loaf pan, often a deep-dish or heavy-duty metal pan, is perfect for this cheesecake because it promotes even baking and helps achieve that signature rustic, slightly charred exterior. Its depth is ideal for the thick, creamy batter, and it allows for the high heat needed to create the characteristic “burnt” top that gives this rustic bread pan cheesecake its unique flavor. For more about baking equipment, you can explore general baking guides.
Can I use a springform pan instead of a loaf pan for this Rustic Loaf Pan Basque?
While a springform pan is traditional for Basque cheesecake, using a rustic loaf pan gives it a unique presentation and a different crust texture. If you use a springform, follow the same lining and baking instructions. The key is the high heat and the caramelization, which you can still achieve in a springform, though the final look will be rounder rather than rectangular. For other cheesecake variations, consider our Frozen Banana Snickers.
How do I get the perfect “burnt” top on my Rustic Loaf Pan Basque?
The “burnt” top is actually a deep caramelization, not a true burnt flavor. Crank your oven to 400°F (200°C) and bake until the top is deeply golden brown, even almost black in spots. Don’t worry; this is what gives the Basque cheesecake its distinctive taste. Ensure you’re using a good quality rustic bread baking pan that can handle the heat evenly.
What toppings complement a Rustic Loaf Pan Basque Cheesecake?
This rustic loaf pan Basque cheesecake is fantastic on its own, but fresh berries like raspberries, strawberries, or blueberries offer a lovely tart contrast. A simple dusting of powdered sugar or a drizzle of fruit coulis also works beautifully. For a truly artisan bread loaf pan rustic experience, keep the toppings simple to let the cheesecake’s creamy texture and caramelized notes shine. If you’re interested in savory dishes, you might like our Turkey Meatloaf Recipe.
Variations of Rustic Loaf Pan Basque Cheesecake You Can Try
Once you master the classic Basque cheesecake, you’ll want to explore fun twists! Using your artisan bread loaf pan rustic setup opens up a world of possibilities. For a lighter touch, try a dairy-free version by substituting full-fat coconut milk and a dairy-free cream cheese alternative. If you love citrus, adding the zest of a lemon or lime to the batter before baking provides a bright, refreshing flavor that’s perfect for a summer treat.
You can also experiment with instant coffee granules dissolved in the heavy cream for a mocha-inspired cheesecake, or swirl in some raspberry or blueberry puree for a beautiful marbled effect. These variations are all fantastic ways to enjoy your rustic bread baking pan creation with a personal touch!
Print
Rustic Loaf Pan Basque: Amazing 1 Step Prep
- Total Time: 5 hours 10 minutes
- Yield: 8-10 servings 1x
- Diet: Vegetarian
Description
A no-crust Basque cheesecake baked in a rustic loaf pan, featuring a signature burnt top and a creamy, melt-in-your-mouth texture. This simple recipe is perfect for impressing guests.
Ingredients
- 2 pounds (900g) cream cheese, softened
- 1 cup (200g) granulated sugar
- 1 cup (240ml) heavy cream
- 4 large eggs
- 1 teaspoon vanilla extract
- 2 tablespoons all-purpose flour
- 1 pinch of salt
Instructions
- Preheat your oven to 400°F (200°C).
- Prepare a 9-inch (23cm) loaf pan by lining it with parchment paper, ensuring the edges overhang for easy removal.
- In a large mixing bowl, beat the softened cream cheese with an electric mixer until creamy and smooth.
- Gradually add the granulated sugar, mixing until fully incorporated and fluffy.
- Pour in the heavy cream and mix on low speed until combined.
- Add the eggs one at a time, mixing well after each addition.
- Stir in the vanilla extract, all-purpose flour, and a pinch of salt, mixing until just combined and the batter is smooth.
- Pour the cheesecake batter into the prepared loaf pan, spreading it evenly.
- Bake for 50-60 minutes, or until the top is a deep golden brown with a burnt appearance and the center is slightly jiggly.
- Turn off the oven and leave the cheesecake inside for an additional 10-15 minutes to gently cool.
- Remove the cheesecake from the oven and let it cool to room temperature.
- Refrigerate for at least 4 hours or overnight.
- Lift the cheesecake out of the pan using the parchment paper.
- Slice and serve, optionally garnished with fresh strawberries or other fruits.
Notes
- For a gluten-free version, swap all-purpose flour for almond flour or a gluten-free flour blend.
- Reduce sugar by 25% for a less sweet version.
- Add citrus zest for a flavor boost.
- Ensure cream cheese is at room temperature for smooth mixing.
- Leftovers can be stored in an airtight container in the fridge for up to 5 days.
- The cheesecake freezes well; wrap slices tightly and freeze for up to 3 months.
- Prep Time: 20 minutes
- Cook Time: 50-60 minutes
- Category: Dessert
- Method: Baking
- Cuisine: Basque
Nutrition
- Serving Size: 1 slice
- Calories: Approx. 350-400
- Sugar: Approx. 25-30g
- Sodium: Approx. 150-200mg
- Fat: Approx. 25-30g
- Saturated Fat: Approx. 15-20g
- Unsaturated Fat: N/A
- Trans Fat: N/A
- Carbohydrates: Approx. 30-35g
- Fiber: Less than 1g
- Protein: Approx. 5-7g
- Cholesterol: Approx. 100-120mg

